Deactivating Calendar Groups
Deactivating Calendar Groups
Calendar groups allow you to manage multiple calendars together. If you no longer need a specific group to be active or available for booking, you can deactivate it. This will disable all calendars within that group without deleting any settings or data.
You can perform this action from the main calendar management area of your CRM.
How to Deactivate a Group
- Navigate to the calendar settings in your CRM and locate the list of your calendar groups.
- Find the group you wish to deactivate. In the row for that group, click the menu icon (typically three dots or an ellipsis) to open a list of actions for that group.
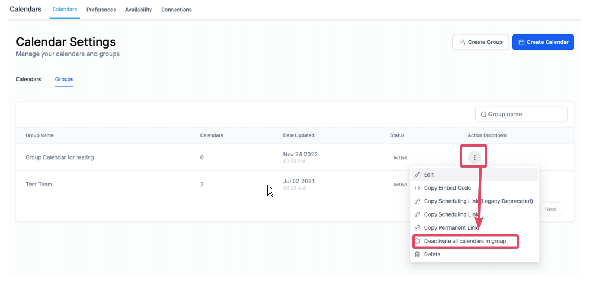
- From the menu that appears, select the option labeled Deactivate all calendars in group or similar.
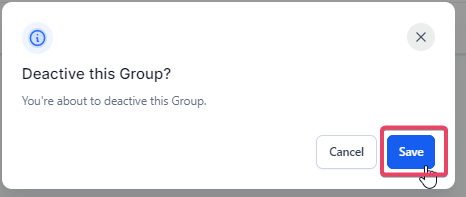
- A confirmation pop-up will appear, asking you to confirm that you want to deactivate the entire group. Review the information and click Confirm or Deactivate to proceed.
What Happens Next
Once confirmed, the calendar group and all calendars within it will be deactivated. They will no longer be publicly accessible for booking appointments. The group and its settings will remain in your CRM in a disabled state, allowing you to reactivate it later if needed. No historical appointment data or calendar configurations will be lost.