How to Create Round Robin Calendars
Creating Round Robin Calendars
Round Robin calendars help distribute appointments or meetings evenly among your team members. This guide walks you through setting one up in your CRM.
Step 1: Create a New Round Robin Calendar
Start by going to your CRM's calendar settings. Look for an option to create a new calendar and select the Round Robin type.
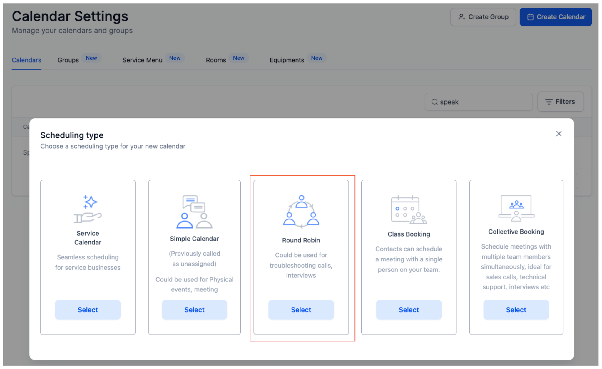
After selecting Round Robin, you'll be prompted to give your calendar a name and configure basic settings.
Step 2: Add Team Members
Next, add the team members who will be part of the rotation. You can include multiple users, and the system will assign appointments to them based on your distribution rules.
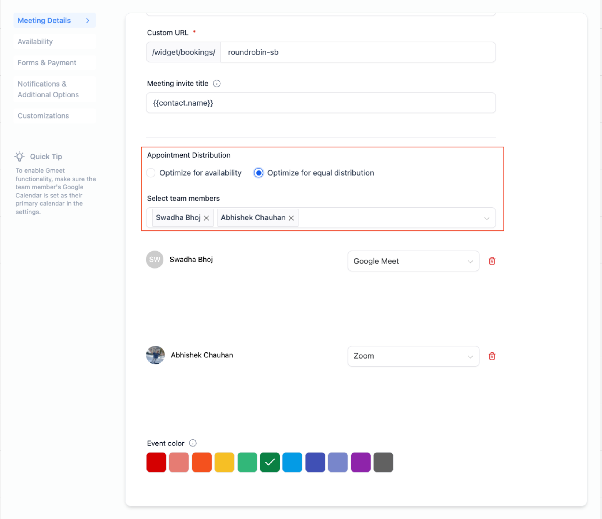
Ensure each member has their availability set up correctly so the system can schedule appointments during their working hours.
Step 3: Configure Distribution Logic
Choose how appointments are assigned:
- Optimize for availability: The system prioritizes team members who are free at the requested time.
- Optimize for equal distribution: The system assigns appointments in a rotating order to balance the workload evenly.
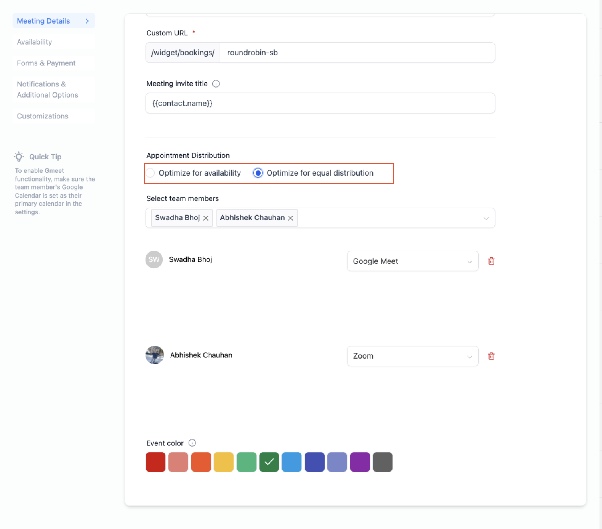
After saving these settings, your Round Robin calendar is ready to use. Appointments booked through it will be automatically assigned based on your chosen logic.