How to Integrate Calendly
Overview
We've added a new action to the Appointments category called "Create Appointment Note." This feature enables you to seamlessly add notes to an appointment as part of a workflow.
Inputs
- appointmentId (string) – Required when using inbound webhook trigger.
- body (string, max length: 5000 characters) – The content of the appointment note.
How It Works
- If you are using any appointment-based trigger (e.g., Appointment Status, Customer Booked Appointment), the appointment ID is not required. The note will be added to the appointment enrolled in the workflow.
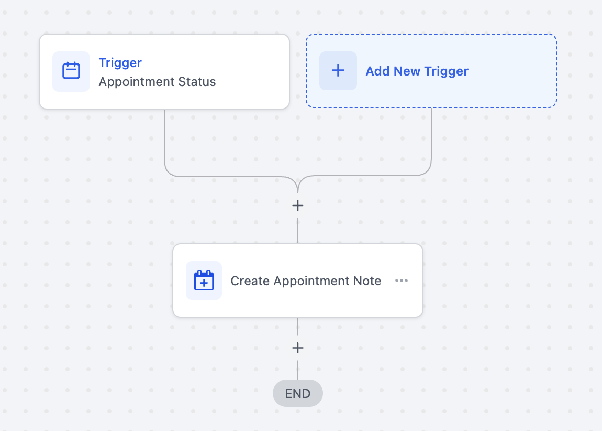
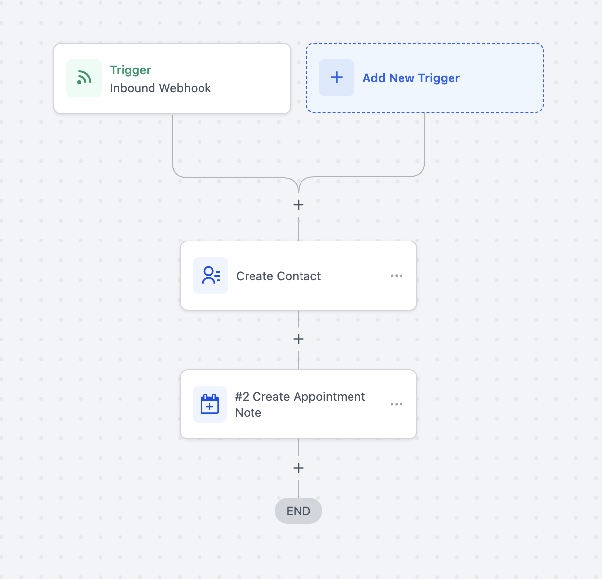
- If you are using an Inbound Webhook trigger, you must pass the appointment ID to ensure the note is added to the correct appointment.
How to Set Up
Action Name: Create Appointment Note
Steps to Use This Action
- Navigate to:
Automations > Create New Workflow > Start From Scratch - Add a Trigger:
- Choose a trigger such as Inbound Webhook, Appointment Status, or Customer Booked Appointment.
- Add an Action:
- Select Add Action > Create Appointment Note.
- Enter an action name.
Configuring Inputs
If using an Inbound Webhook trigger:
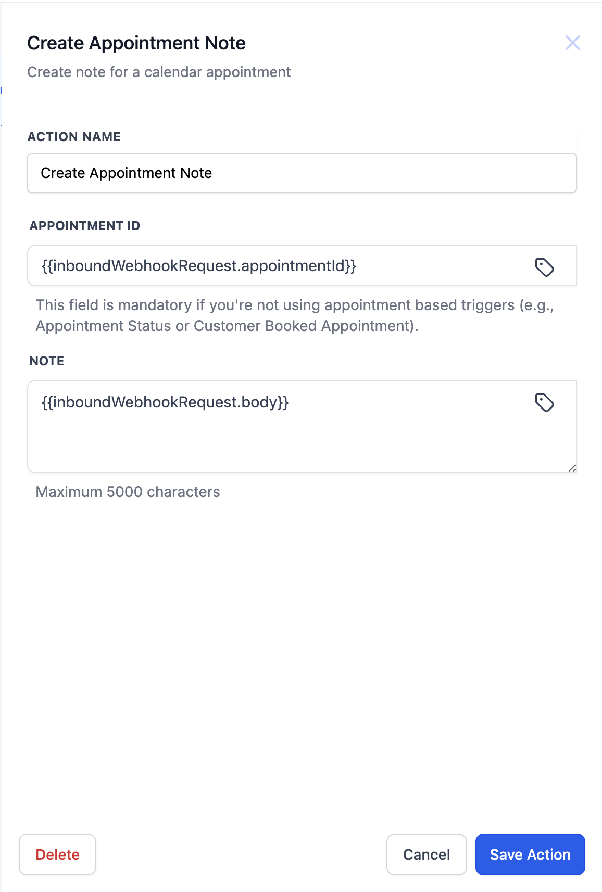
- Appointment ID: Add the appointment ID using this custom value:
{{inboundWebhookRequest.appointmentId}}
- Note Body: Use the following custom value to add the note content:
{{inboundWebhookRequest.body}}
If using an Appointment-based trigger (Appointment Status or Customer Booked Appointment):
- Appointment ID is not required.
- Note Body: You can manually enter a custom note of your choice.
Important Considerations
- If using Inbound Webhooks, ensure that the webhook payload includes both appointmentId and body for seamless functionality.
- The body field has a maximum limit of 5000 characters.
This feature allows businesses to efficiently log appointment-related notes directly through workflow automation, reducing manual effort and improving organization.