Populate Custom Fields and capture in submission using Custom HTML/Javascript Logic
Populate Custom Fields and Capture Data Using Custom HTML/JavaScript
You can use custom HTML or JavaScript to automatically populate hidden custom fields in your CRM forms and ensure the data is captured when the form is submitted. This is useful for storing information like referral sources, session data, or other values without requiring user input.
Find the Custom Field ID
Before writing your script, you need to identify the unique ID of the custom field you want to populate. Here’s how:
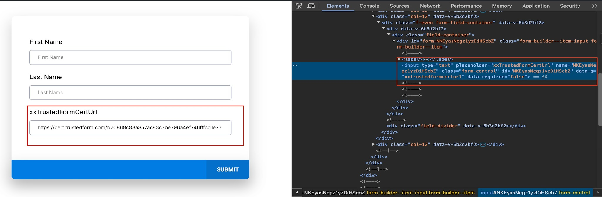
- Open the form preview in your CRM.
- Right-click anywhere on the page and choose Inspect to open the browser’s developer tools.
- Click the element selection tool (usually represented by a mouse cursor icon).
- Click on the custom field in the form preview.
- In the Elements panel, locate the
nameoridattribute for the field—this is your custom field ID.
Write Your JavaScript Code
Once you have the custom field ID, use JavaScript to set its value and trigger the necessary events so the CRM recognizes the input. Replace customFieldId with the actual ID you retrieved, and replace myData with the variable or value you want to store.
document.getElementsByName('customFieldId')[0].value = myData;
document.getElementsByName('customFieldId')[0].dispatchEvent(new Event("input"));
Note: myData is a placeholder in this example. You must replace it with the actual data source or variable in your custom code, such as a URL parameter, cookie value, or JavaScript function result.
Add the Code to Your Form
Embed your JavaScript within a <script> tag in the form’s custom HTML area, or include it in an external script that runs on the form page. The code should execute when the page loads to pre-fill the field before the user interacts with the form.
When the form is submitted, the value you set will be captured and stored with the rest of the submission data in your CRM.