Pay For Service Appointments In The Mobile App POS
Enabling Payments for Service Appointments
Before you can accept payments for appointments through the mobile app, you must first configure the payment settings for your calendar within the main CRM web dashboard. This is a one-time setup process.
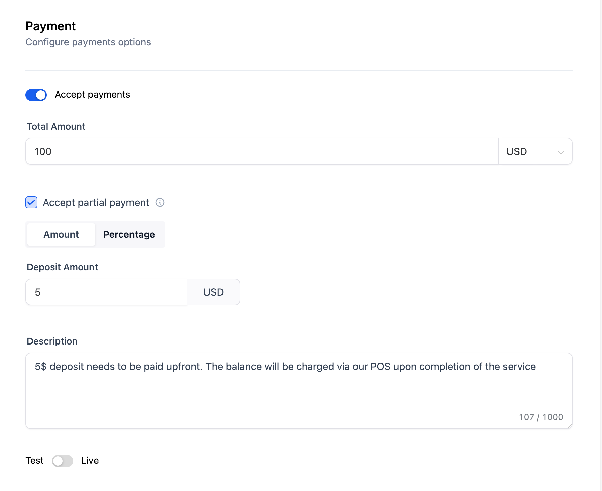
Navigate to the settings for your service calendar. Locate the section related to forms and payments, and ensure the option to accept payments is enabled. You must also select "Live" mode to process real transactions. Save your changes before exiting.
Viewing and Managing Appointments on Mobile
Once payments are enabled, any service appointments booked will appear in your mobile app's calendar view.
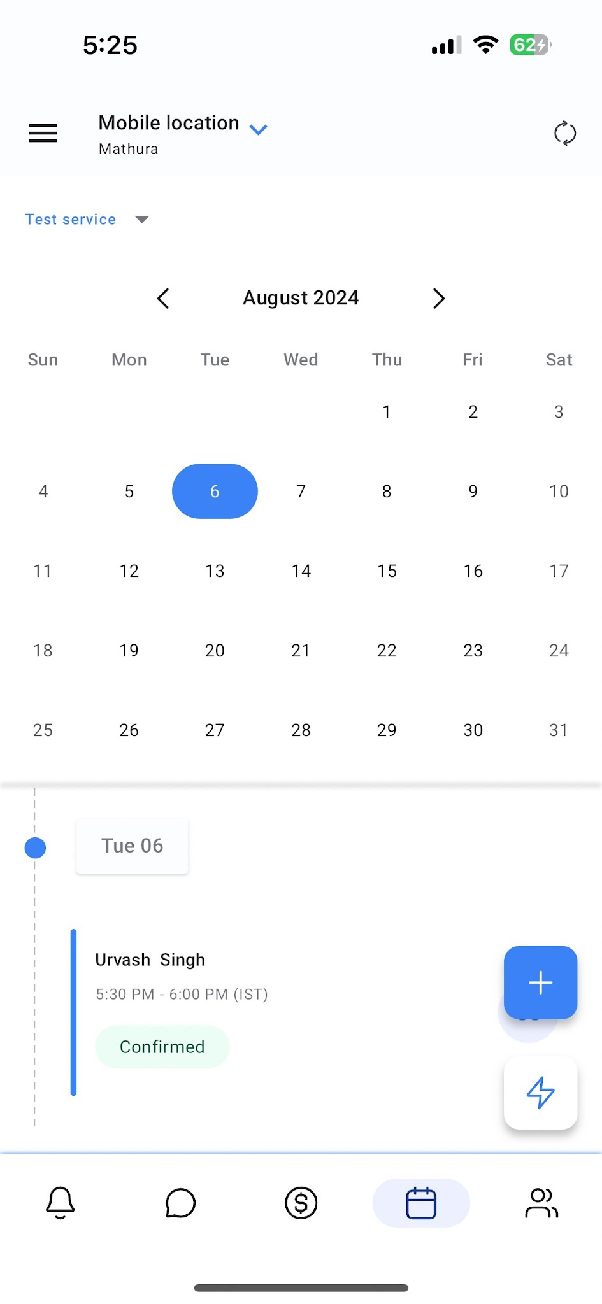
Open the CRM mobile app and ensure you are logged into the correct account. Go to the calendars section to see your scheduled appointments.
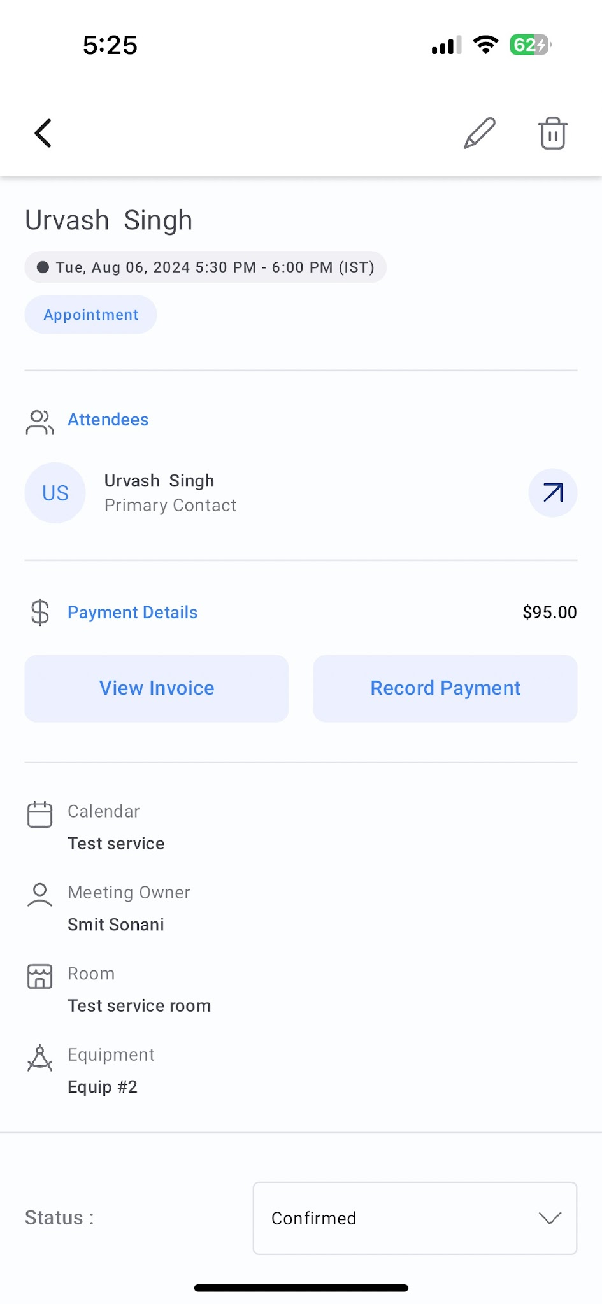
Tap on a specific appointment event to open its details. You will see the amount due for the service displayed clearly.
Reviewing the Invoice
From the appointment details screen, tap the option to view the invoice. This will display the full breakdown of charges for the service.
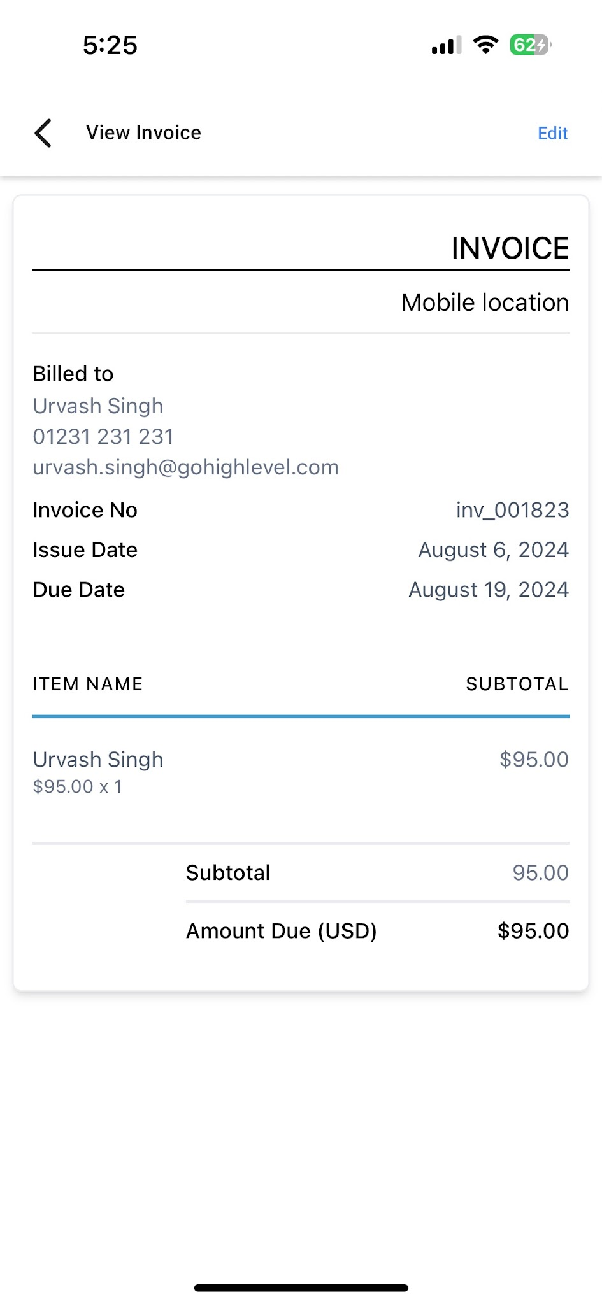
If additional items were used or service time was extended, you can edit the invoice directly from this screen to adjust the total amount due before processing payment.
Recording a Payment
To collect payment, tap the "Record Payment" button from the appointment details. You will be presented with several payment methods.
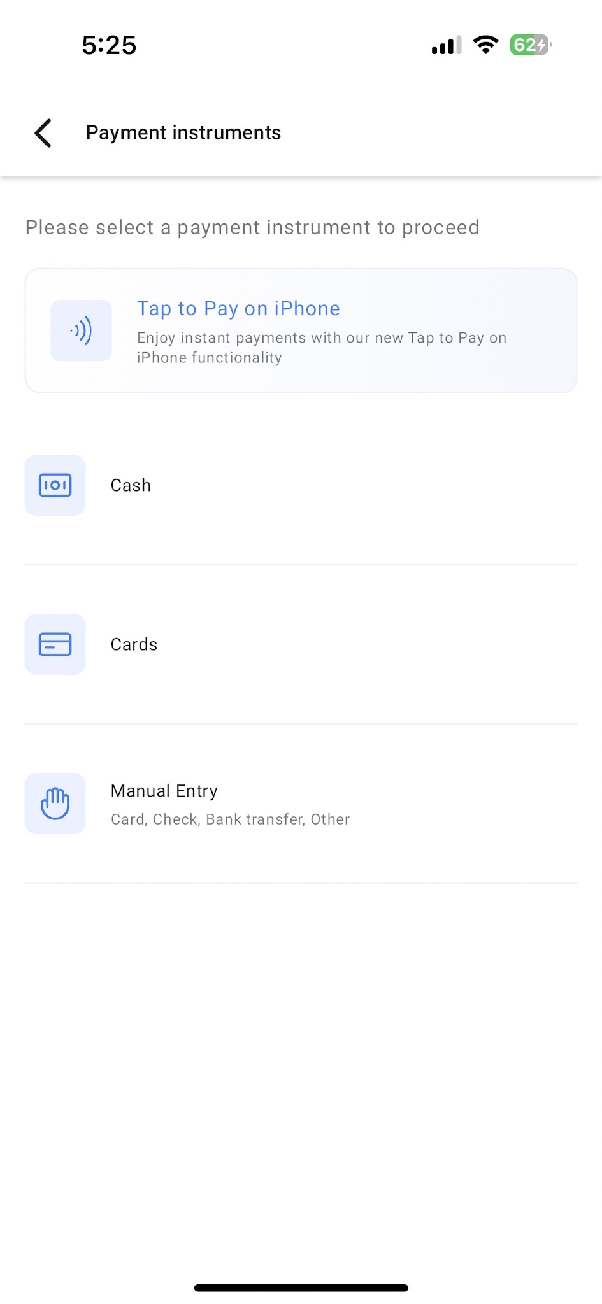
You can choose to process the payment using Tap to Pay (with a compatible card reader), by manually entering a card, recording a cash payment, or using another manual entry method. Follow the on-screen prompts to complete the transaction. Once finished, the payment will be recorded against the appointment.
Benefits of Mobile Payment Collection
This feature integrates your calendar and point-of-sale systems, creating a seamless workflow for collecting payments at the time of service. It eliminates the need for separate invoicing and payment tracking, saving time and reducing errors.