How to schedule a blog post
How to Schedule a Blog Post
Scheduling blog posts in your CRM allows you to plan content publication in advance. You can set a specific date, time, and timezone to ensure your posts go live exactly when you want them to.
Create a New Blog Post
To begin, navigate to the blog section of your CRM and select the option to create a new post.
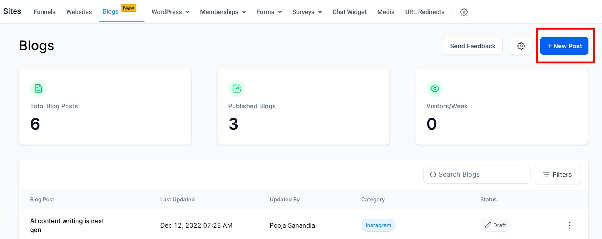
Write Your Content
Compose your blog post by adding a title, body text, images, and any other elements you want to include. Use the formatting tools to style your content as desired.
Proceed to Publishing Options
Once you’ve finished writing, click the Continue button to move to the next step.

Set the Schedule
On the publishing screen, choose the Schedule option. Select the date and time you want the post to be published, and make sure to set the correct timezone for your audience. Once configured, confirm your settings to schedule the post.
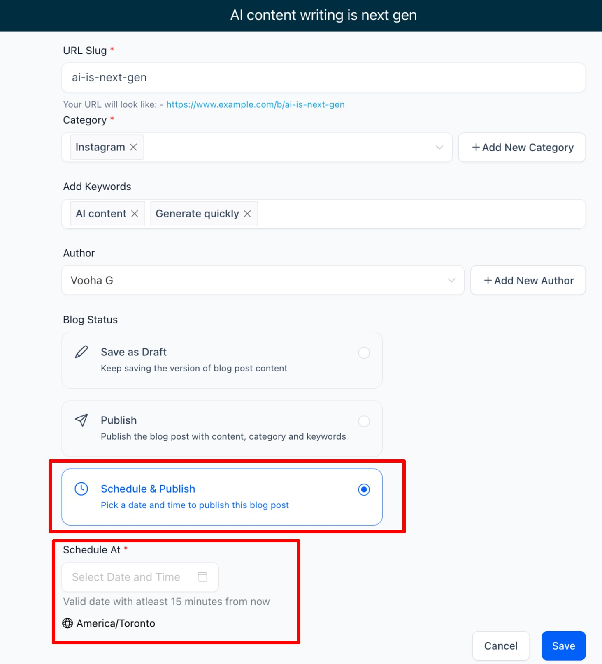
Your blog post is now scheduled and will automatically publish at the specified time. You can view or edit scheduled posts from your blog dashboard.